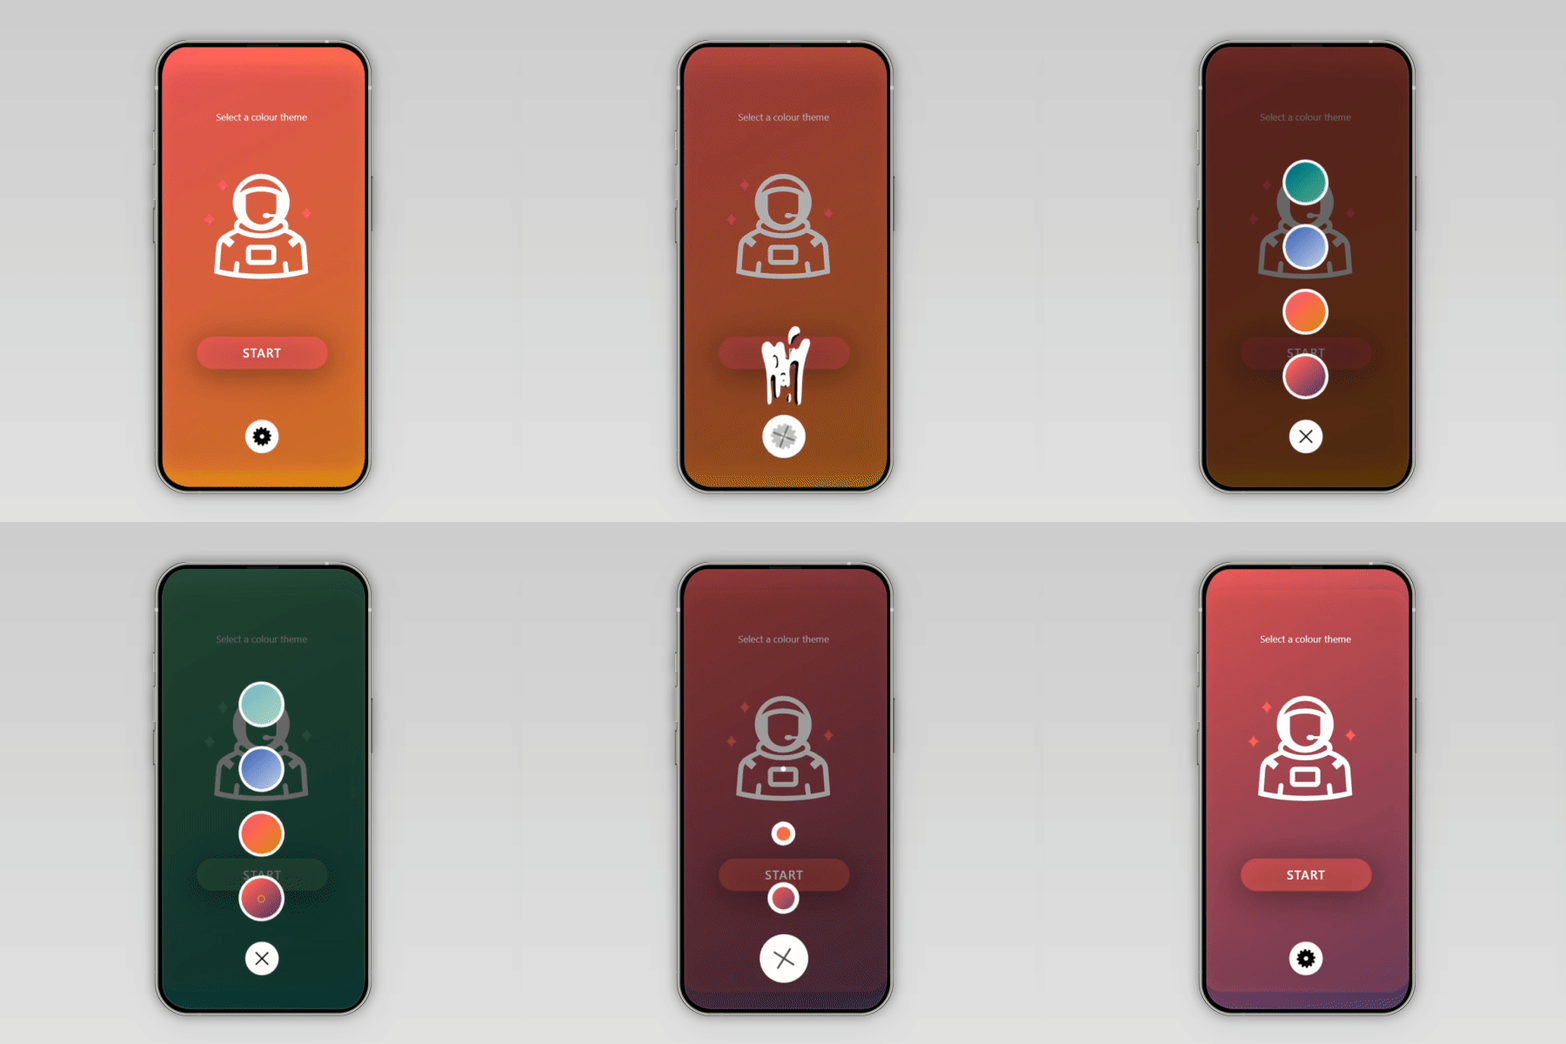
I am a big believer in enhancing the application user experience wherever possible, and what better way than incorporating eye-catching animation?! I have been looking at different methods for adding animation to canvas apps and wanted to share a method using Lottie Files. In this example, I demonstrate how to create a lightweight animated menu that pops open and then closes when triggered by the user.
I hope you find this article informative, and it helps create opportunities to incorporate more animation in canvas apps.

What's covered in this blog
This article covers several different concepts and how they work together to bring powerful yet lightweight animation to power apps. Here is the general structure of what is covered:

What are Lottie files?
A Lottie is an open-source JSON-based animation file format. It can also have smart settings that can allow for your animation to be interactive, which is very useful for power apps.
One of the main benefits of LottieFiles is that the Lottie web player runs on any browser that supports modern Javascript. Libraries also exist for incorporating Lottie playback in IOS, Android and Tizen systems, so the majority of phones and tablets. They are also dynamic, scalable and maintain their quality being drawn using vectors.
A Lottie is a JSON-based animation file format that enables designers to ship animations on any platform as easily as shipping static assets. They are small files that work on any device and can scale up or down without pixelation.
Accessing Lottie File Assets within Power Apps
Credit must be given to Luis Filipe dos S Nunes for creating the Lottie Files code component (PCF) used in this example. He has created a PCF wrapper for the Lottie animation library, and you can read all about his work here, as well as accessing the .zip file download link.
Enable the Power Apps component framework feature
Follow these steps closely to enable code components in your environment and import the solution file which will allow you to use LottieFile asset links in your canvas apps. System administrator privileges are required to enable the Power Apps component framework feature in the environment from the Power Platform admin centre. The toggle can be found under your environment settings > Features. Just remember to press Save...

Once that is done, select Solutions and import the solution file downloaded from GitHub.

Browse to and select CustomComponents.zip making sure you import it into the correct environment. It may take a little while to import.

The custom component can then be added to Power Apps under Get more components.

Select the code option and import the Lottie Component. If you cannot see the code tab, then the code component feature has not been enabled correctly in the environment.

Select 'LottieComponent' under Code components which will insert a blank square on your canvas.

Add the animation ASSET
Create an account with LottieFiles to browse loads of free animations. Here is a link to my animation used in this example:
It is worth noting that LottieFiles has a useful editor which allows you to play around with different layer colours and playback speed.
All we need for the power app PCF is the asset link e.g "https://assets6.lottiefiles.com/packages/lf20_ABfo3PSHrR.json"
Creating your own animations
My preferred method to create animations is using Adobe After Effects. There is an Adobe After Effects Lottie Files plug in which allows you to preview Lottie animations very easily across web and mobile devices from within Adobe After Effects. There are, however, a number of limitations with supported features across different devices worth knowing about which are listed here.
The key is to create the full animation timeline within one asset and then trigger specific segments within Power Apps.

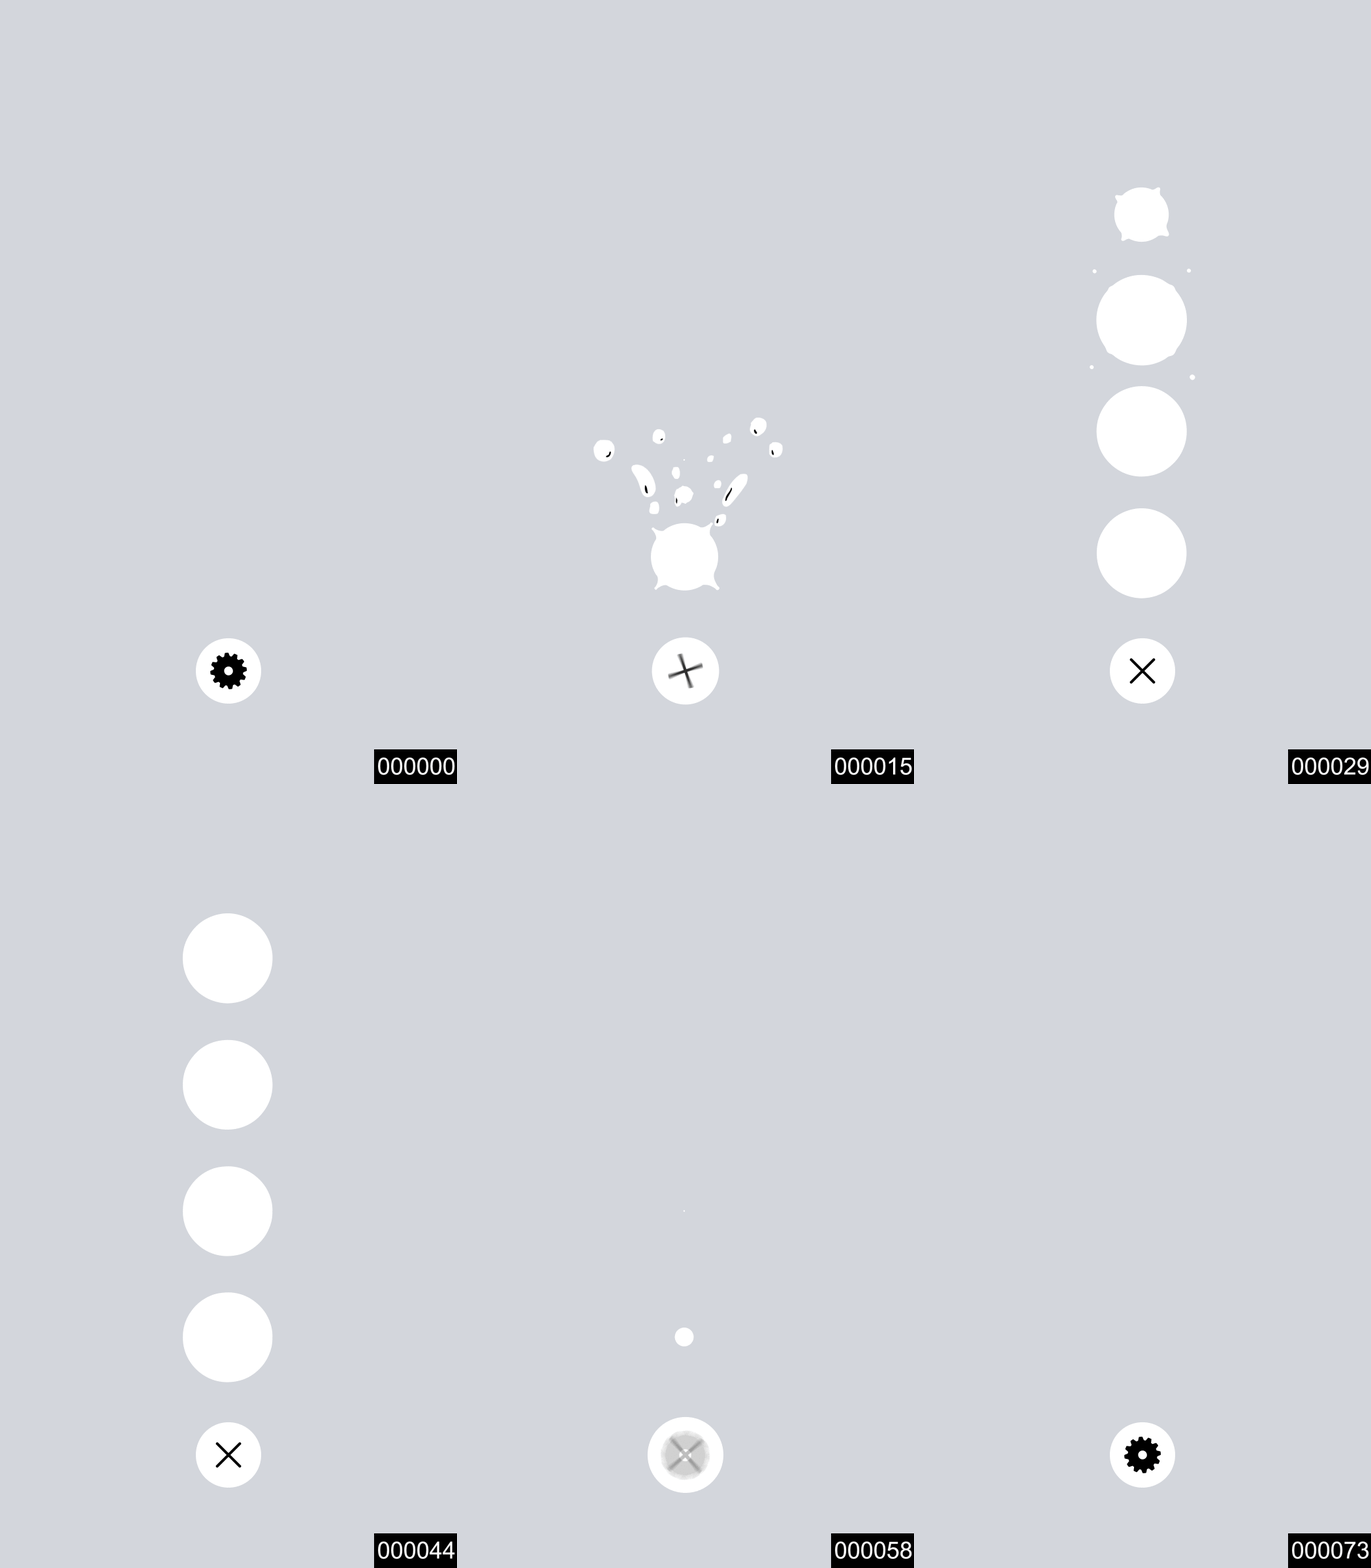
For example, this animation is 74 frames long. The menu opens from frame 0 to 44, and then closes from frame 45 to 74. These specific segments can be triggered from the power app.

Here's another example I created with frame numbers rendered:

Configuring Power Apps
Back in power apps, paste the LottieFiles asset link into the PCF LottieAnimationURL property. You may only see the first frame initially but changing the Loop and AutoPlay properties on will preview the animation. You may need to click onto a different screen and then return back again for the change to take effect.

Change the Loop and AutoPlay toggles back to the off position.
The animation layer will sit on top of your app screen, and then buttons are added in front of the animation. These buttons can be hidden so they're only accessible when needed.

Main menu button
Insert a button with a Height and Width of 50 pixels (or a similar size to your main menu button). Clear the Text property and set the Border radius to 50 pixels to round the edges, ensuring the button matches the menu button as closely as possible. Position it over the main menu button on the animation. The general idea is that the buttons cover areas that the user wants to interact with.
In this example, I set the button properties to be mainly transparent except for the PressedFill which is set to match the animated button background colour, helping to indicate when button has been pressed.

The code for the OnSelect property for the button that opens and closes the menu is:
Set(gloVarSegments, If(tglMenuState, "0,44", "44,74"));
Set(gloVarStart, GUID());
Set(gloVarState, !gloVarState)
The gloVarState variable can added to the Default property of a hidden toggle control showing whether the menu is open or closed, and crucially which segments of the animation to play next. I renamed the toggle control to 'tglMenuState' and each time the menu button is pressed, it reverses the state of the gloVarState variable.

The gloVarSegments variable can be set with an IF statement for the segment frames depending on the toggle position. The GloVarSegments variable can be added to the StartEndFrame property of the Lottie Component.

The Lottie Animation requires a start token to trigger, so we can generate a new GUID value, set it as variable and add this variable to the StartAnimationToken property of the Lottie Component.

Try testing the button which should now open and close the menu.
Internal Menu buttons
Copy the main menu button 4 times and position them over the internal menu buttons. Change the OnSelect property of the internal menu buttons to:
Set(gloVarClicked, 1); // For the first buttonSet(gloVarClicked, 2); // For the second button...and so on, for each internal menu button.
These variables can be setup within your app to change settings or navigate to different screens - or anything else you can think of.
We can then set the Fill property of each internal menu button with a 'Switch' command, which changes the button's fill colour depending on the selected button.
// First button
If(gloVarClicked = 1, RGBA(255,255,255,0.5), Transparent)
// Second button
If(gloVarClicked = 2, RGBA(255,255,255,0.5), Transparent)...and so on, for each button.
Set the Visible property of each internal menu button to '!tglMenuState', so they disappear as soon as the menu is closed.
Summary
And that's it...! Hopefully you have enjoyed reading about this method for using powerful yet lightweight animations in power apps. Animated menus are a great way to take your apps to the next level.
If you are creating your own Lottie animations for power apps, then I would recommend thinking carefully about how the segments are triggered in a way that does not impact any other features of the app. Some aspects are quite fiddly and there may be neater methods available, but I believe the overall impact creates a nice effect and adds an extra dimension to any app.
Thank you for reading this post and I appreciate any comments, questions or queries.


